
Below is a guide for installing the add-on for Kodi. This is a 3rd party add-on so please do not post questions about this add-on in the official Kodi forums.
Add-On Offers:
- Movies, TV Shows, Episodes (Widget), MyMovies, MyTV Shows, IPTV, IP Radio, Retro Cartoons, Documentaries, StandUp Comedy, TVmaze Calendar, Latin Music, Ambient Videos, Movie Channels, TVpassport, Channels 24/7, TV Shows, Tools.
Works better with a Debrid account. If you don't already have a Real Debrid account you can get one from here.
- Protect your browsing data with a verified no-logs VPN
- Encrypt your connection to any Wi-Fi network
- Securely access streaming services & live sports
- 30 days money back guarantee
Use the link below to find good deals from IPVanish.

If you are installing an add-on for the first time or installing on a fresh install of Kodi you need to turn on Unknown Sources instructions follow this paragraph. If you have already turned it on then just Jump to the guide
- Open Kodi
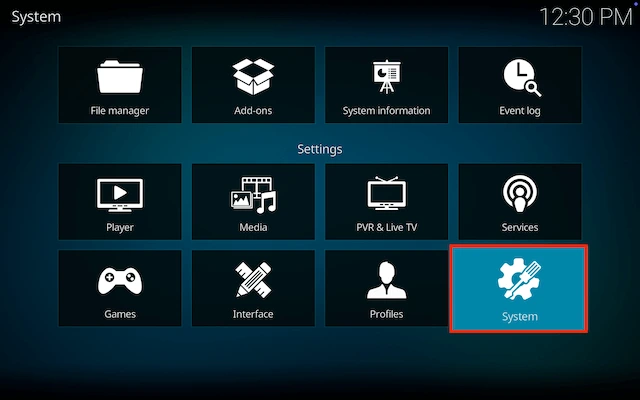
- Select Settings (cog icon top left)

- Select System
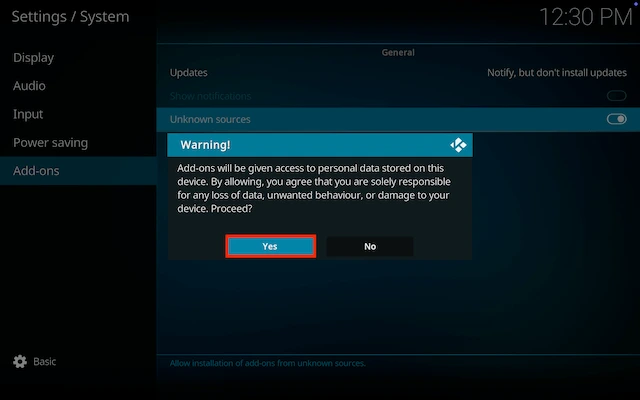
- Scroll down to Add-ons and move to the right and click on Unknown sources

- You will see a popup warning about giving access. Click Yes
- Now go back and click on Updates
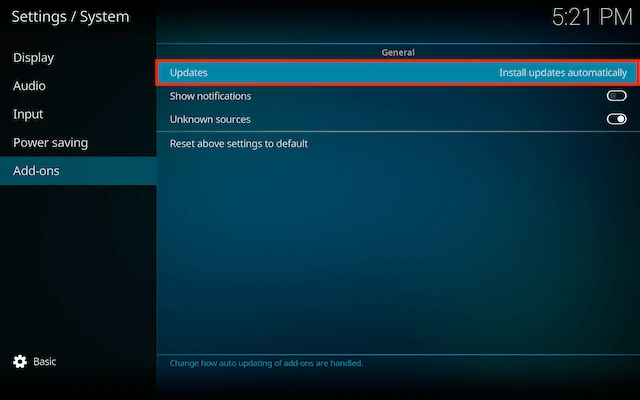
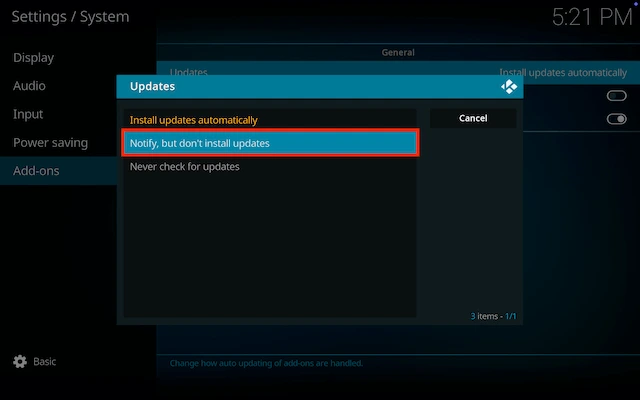
- Change Install updates automatically to Notifiy, but don`t install updates (this means you can see when updates are available and update the ones you want)
**How to Install on Kodi for Firestick or Android Device:**
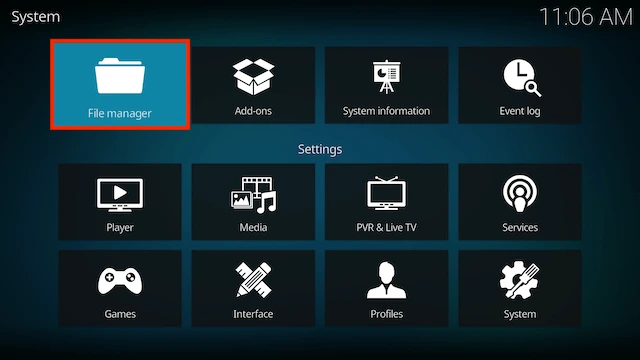
- Go to the Kodi home screen & select Settings (cog icon top left)
- Select File Manager
- Select Add Source

- Select None

- Type the following EXACTLY
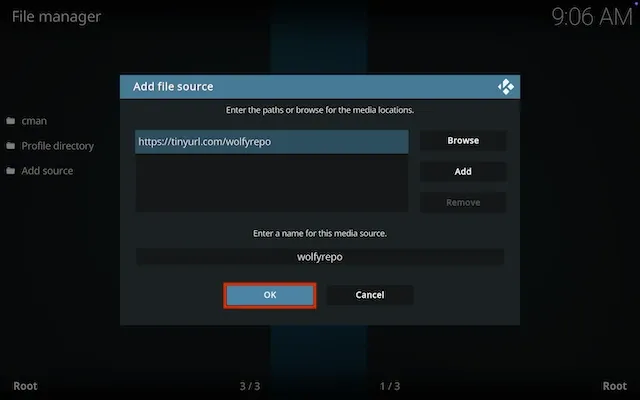
https://tinyurl.com/wolfyrepoand select OK
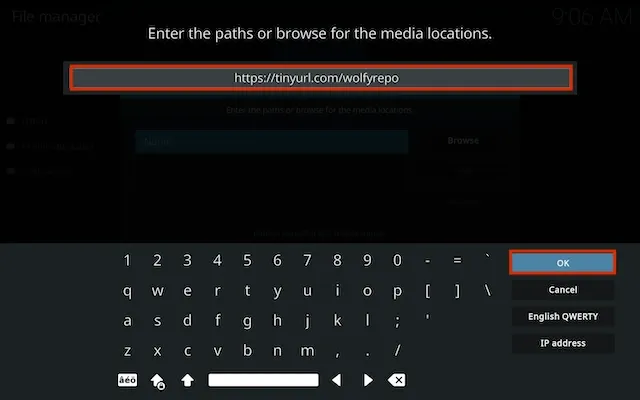
- Click OK
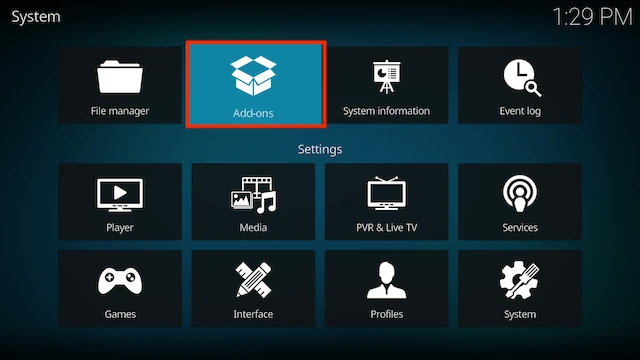
- Click back on your remote/keyboard
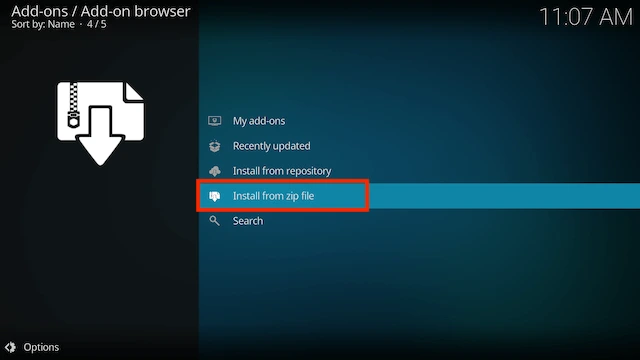
- Select Add-ons
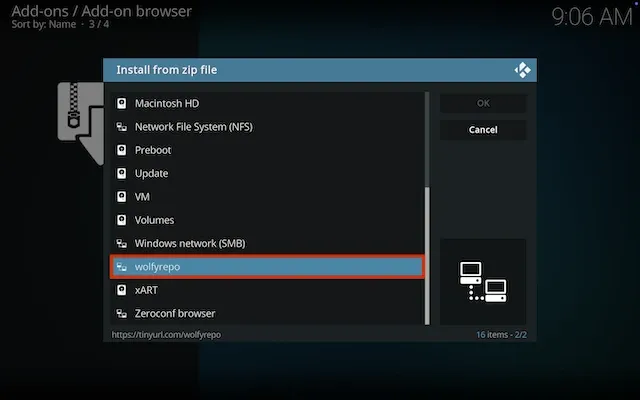
- Select Install from zip file
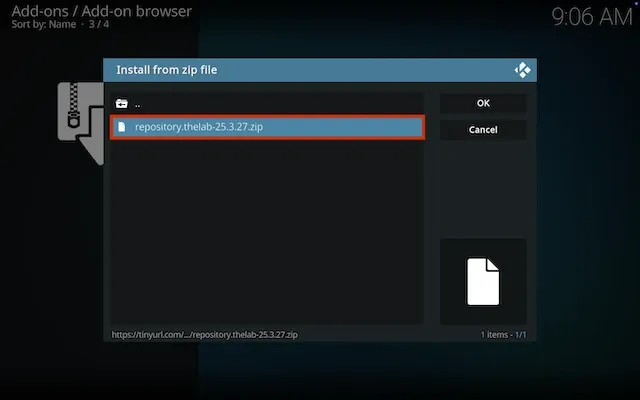
- Select wolfyrepo (or whatever you named it)
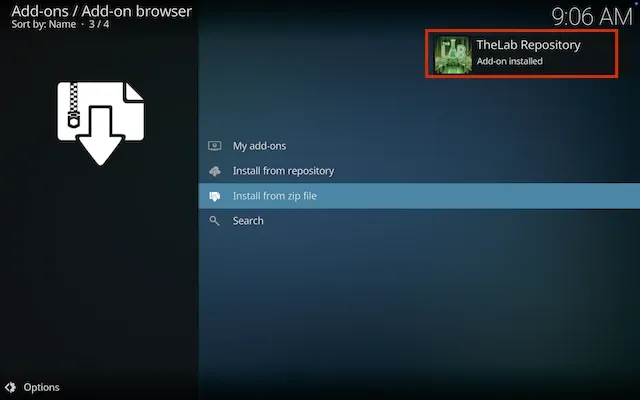
- Select repository.thelab-xx.x.xx.zip
- Wait for the Add-on enabled notification
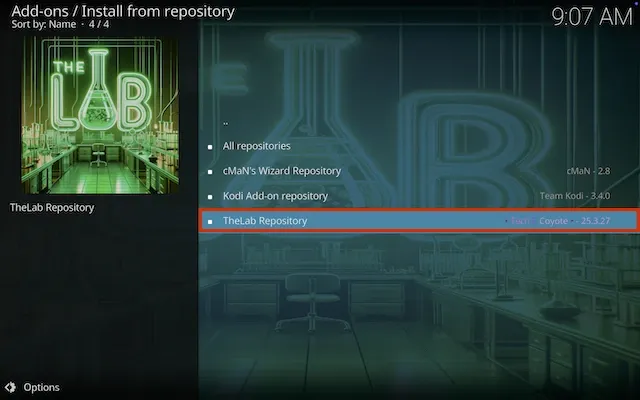
- Select Install from Repository

- Select TheLab Repository
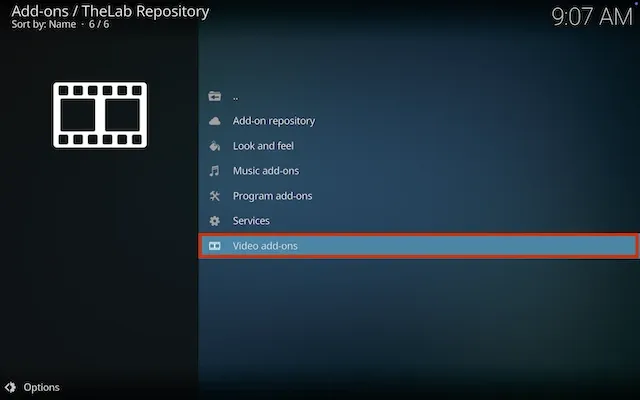
- Select Video add-ons
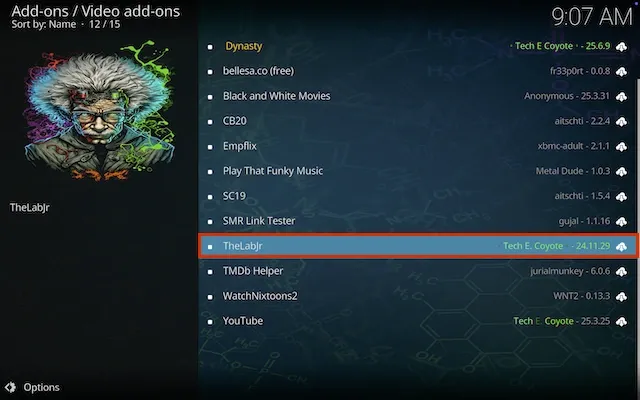
- Select TheLabJr
- Select Install
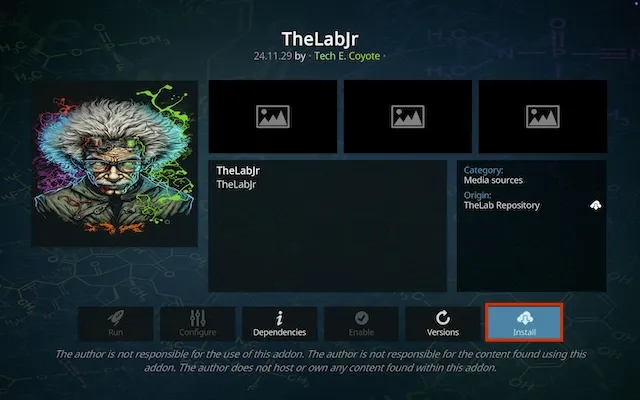
- Select OK
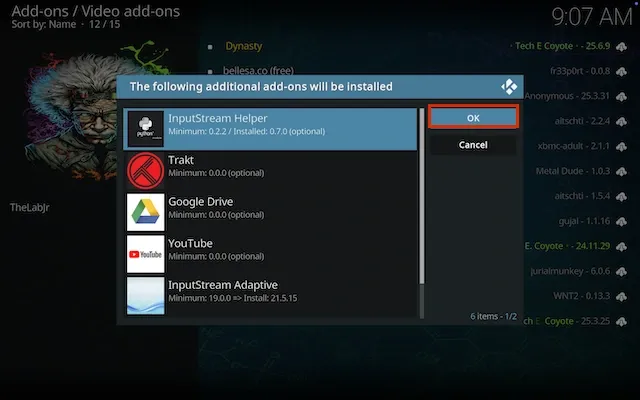
- Wait for Add-on installed notification
- Once you see the add-on installed notification it is ready to use and will be available in your add-ons section
- Protect your browsing data with a verified no-logs VPN
- Encrypt your connection to any Wi-Fi network
- Securely access streaming services & live sports
- 30 Days Money Back Guarantee
Use the link below to find good deals from IPVanish.
More Kodi Add-Ons Available Here
Legal Disclaimer: This tutorial is purely educational. Seo-Michael.co.uk doesn’t own, host, operate, resell, or distribute any streaming apps, addons, websites, IPTV or services. The page contains some unverified services, and we are not certain whether they hold legal licenses to distribute the content. Seo-Michael.co.uk does not verify the legality of each app/service in all regions. Do your due diligence if you use any of the unverified apps/services, and stream only content that is available in the public domain. The end-user shall be solely responsible for the media accessed.
