
As Fen Light will no longer receive updates a fork has been released and TikiPeter is involved in the fork so you know it's gonna be good.
Below you will find how to update the original Fen Lite if you have it installed so you get future updates or you can scroll further for new installation instructions including the add-on, adding the coco module and setting up trakt and debrid.
If you already have Fen Light installed do the following
In Kodi, go to Addons, open Fen Light -> Tools -> Settings -> General -> scroll down to 'Manage Addon Updates' and change these two fields:
Github Username: FenlightAnonyMouse
Github Repo Address: FenlightAnonyMouse.github.io
Now go back to the Tools menu, and select Update Utilities -> Check For Updates
This is a 3rd party add-on so please do not post questions about this add-on in the official Kodi forums.
You need a Debrid account for this add-on to work. If you don't already have a Real Debrid account you can get one from here.
Add-On Offers:
- Movies/TV Shows
Browse the internet anonymously. Get yourself a VPN to stay protected online. Use the link below to find good deals from NordVPN.

How to Install Fen Light AM on Kodi for Firestick or Android Device:
- Open Kodi
- Select Settings (cog icon top left)
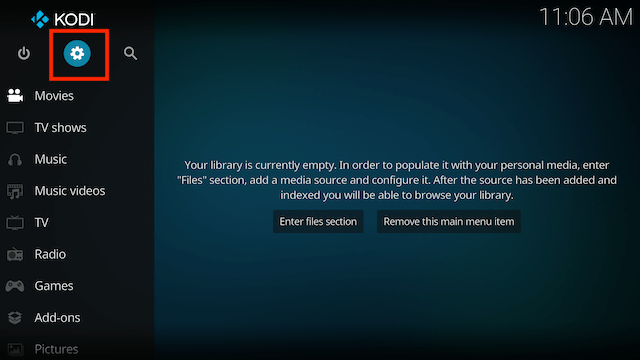
- Select File Manager
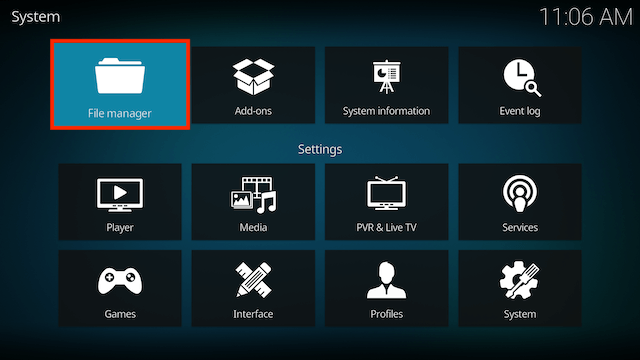
- Select Add Source

- Select None
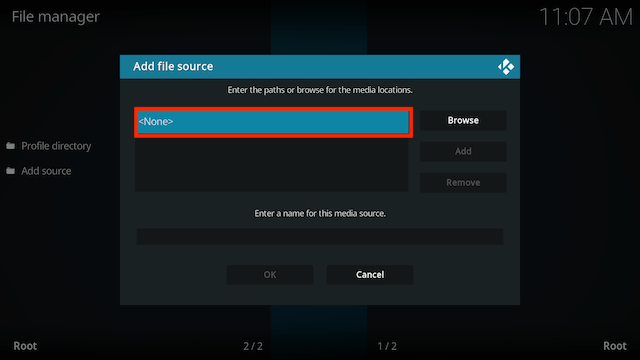
- Type the following EXACTLY
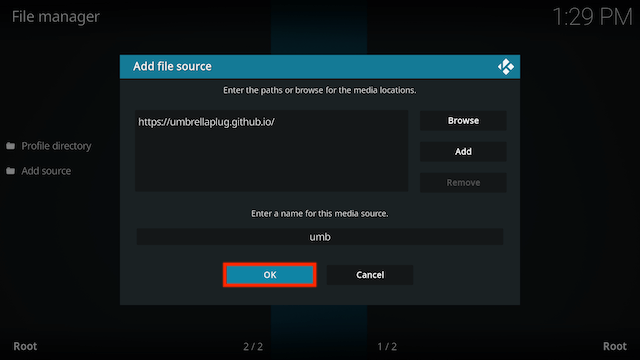
https://umbrellaplug.github.ioand select OK
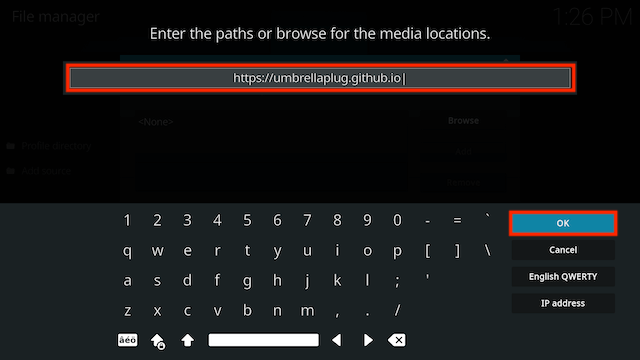
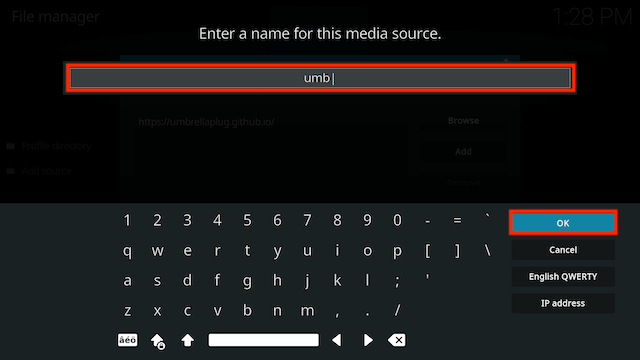
- Click the box underneath marked Enter a name for this media source
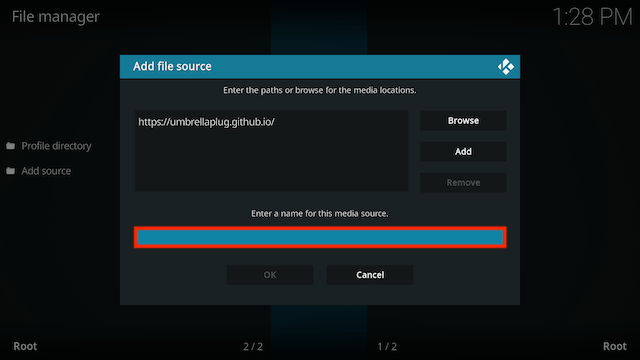
- Type umb then click OK
- Select OK
- Click back on your remote/keyboard
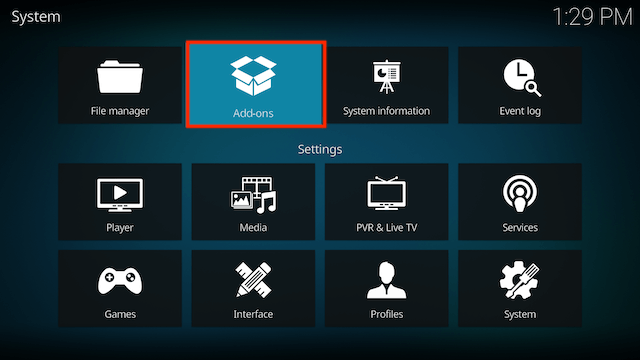
- Select Add-ons
- Select Install from zip file
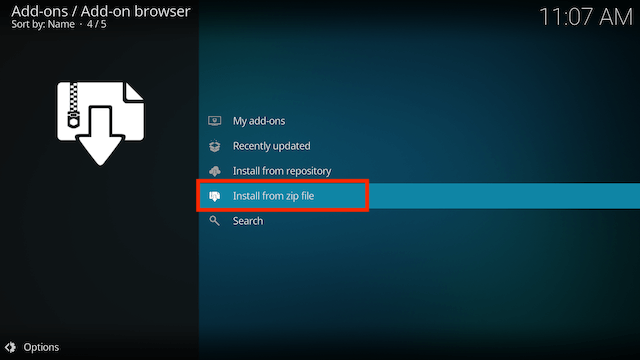
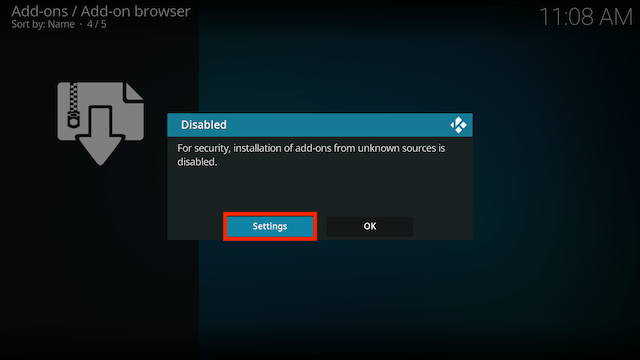
- If you are doing this on a fresh install you will see a message saying this has been disabled. Just keep following the guide and we'll fix that. If you already have installing from zip files (unknown sources) enabled just skip the next 4 steps
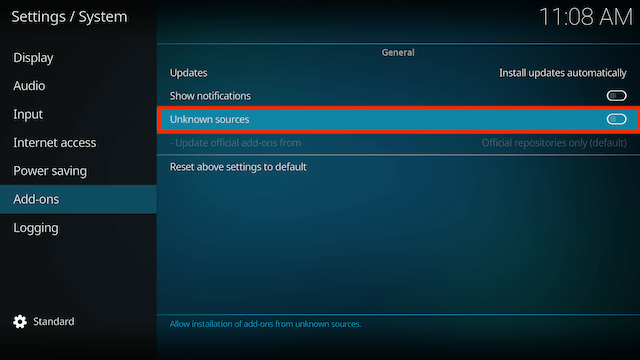
- Click on Settings
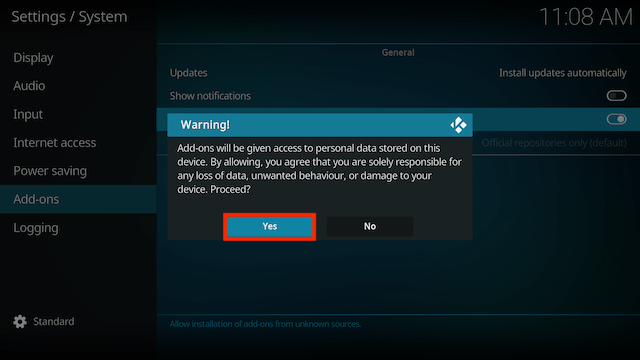
- Turn on Unknown sources
- Select Yes
- Press back once your remote/keyboard and select Install from zip file again

- Select umb
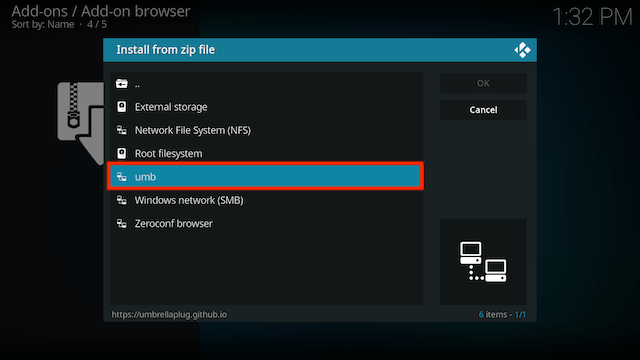
- Select repository.umbrella-x.x.x.zip
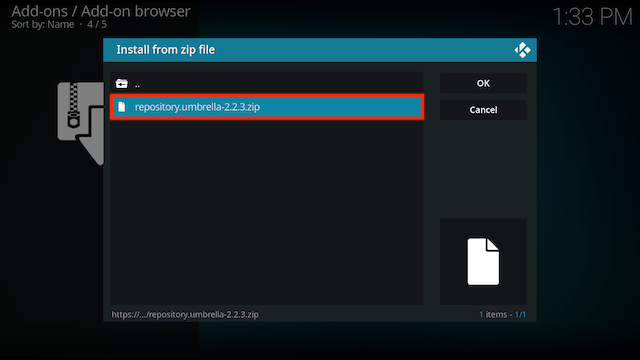
- Wait for the Add-on enabled notification
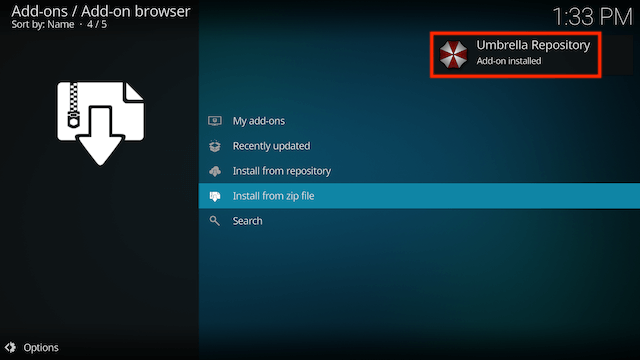
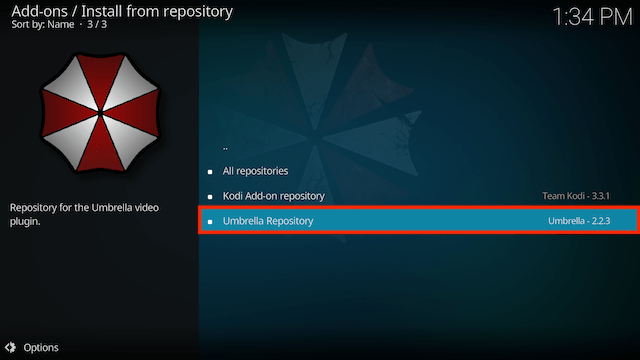
- Select Install from Repository
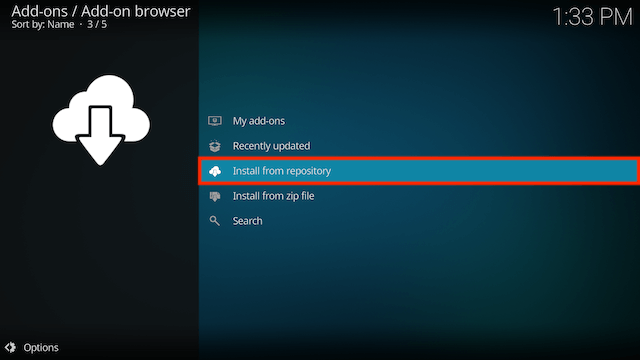
- Select Umbrella Repository
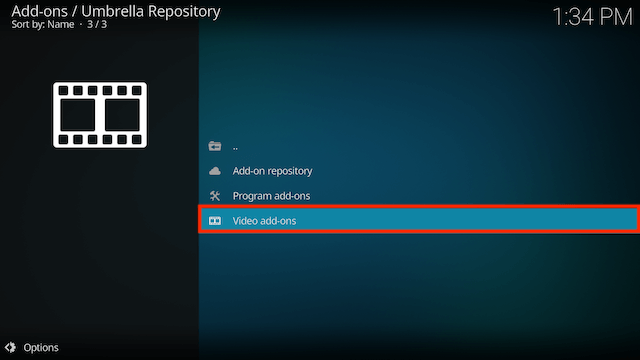
- Select Video add-ons
- Select Fen Light
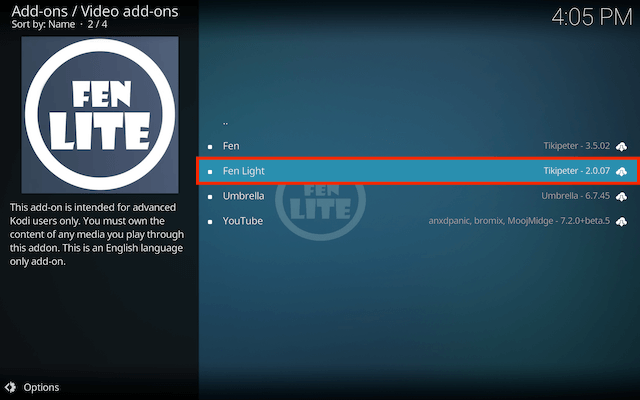
- Wait for the Add-on enabled notification
- You will now see the first time use screen details.
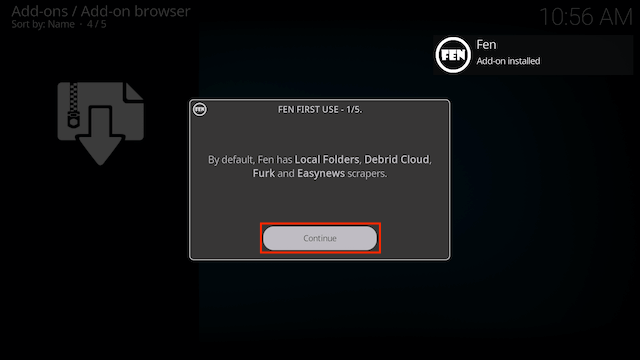
- Just keep selecting Continue (you can read what each screen says as you are clicking) until you get to the 5th screen and select finish
- Keep scrolling for installing the CocoScrapers Module
Now we need to Install the CocoJoe Repository for CocoScraper Updates in Fen
- Open Kodi
- Select Settings (cog icon top left)
- Select File Manager
- Select Add Source
- Select None
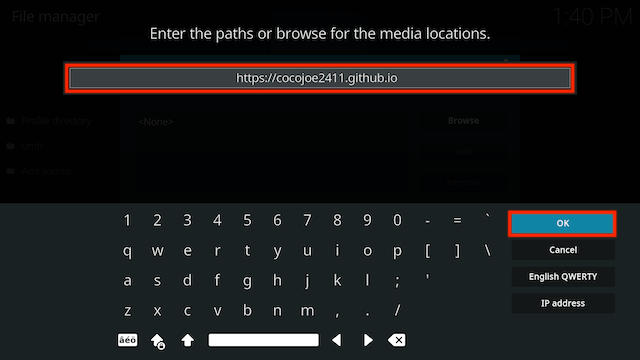
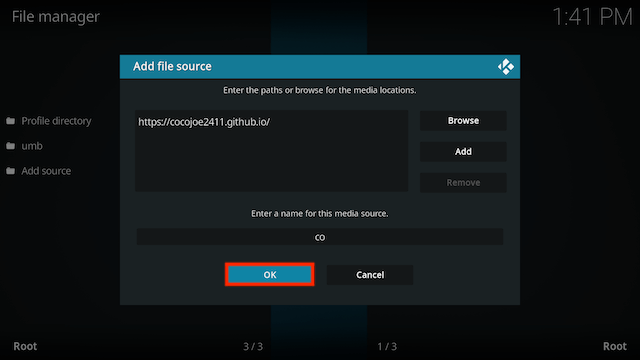
- Type the following EXACTLY
https://cocojoe2411.github.ioand select OK
- Click the box underneath marked Enter a name for this media source

- Type co then click OK
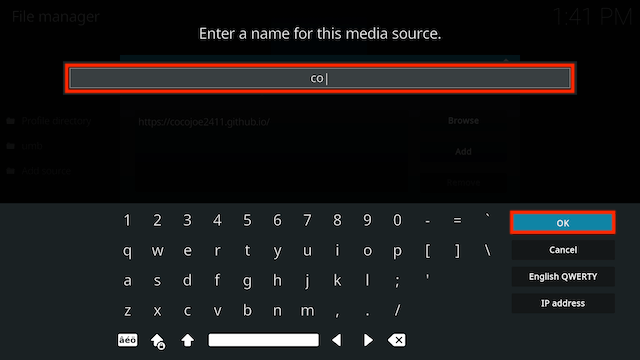
- Select OK
- Click back on your remote/keyboard
- Select Add-ons

- Select Install from zip file
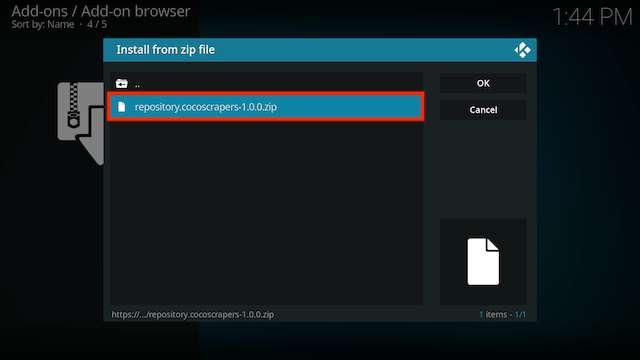
- Select co
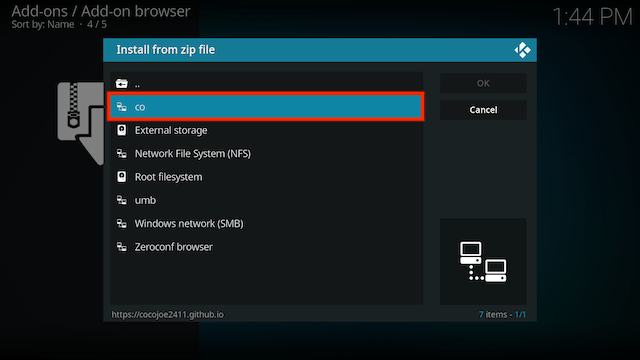
- Select repository.cocoscrapers-x.x.x.zip. Wait for installed notification
- Select Install from Repository
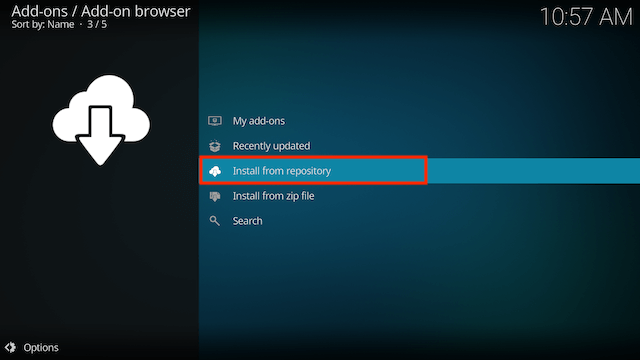
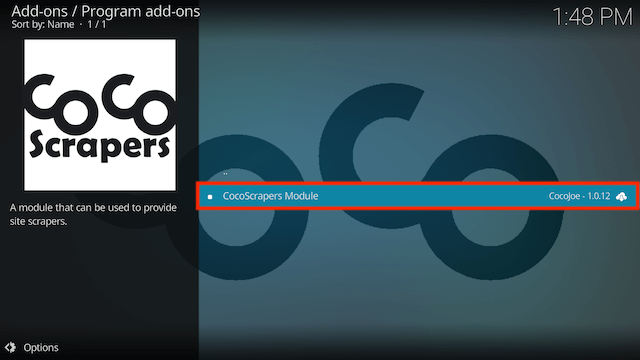
- Select CocoScrapers Repository
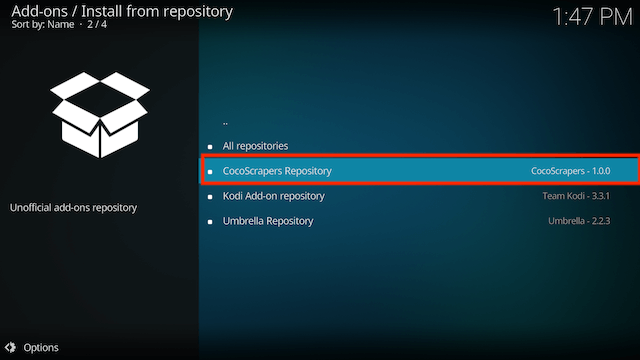
- Select Program add-ons
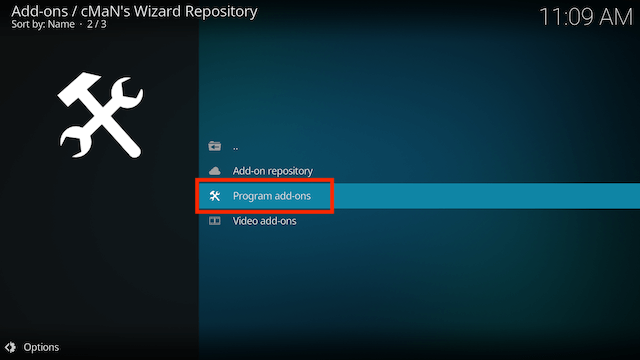
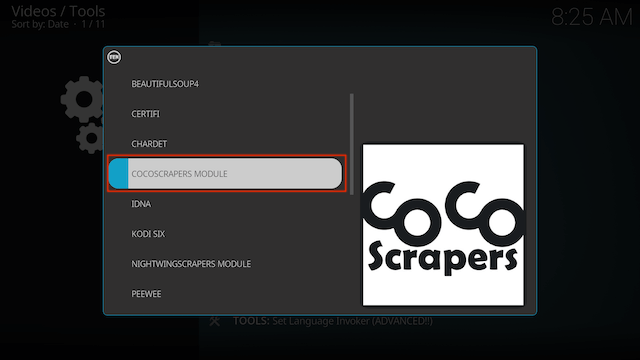
- Select CocoScrapers Module
- Select Install
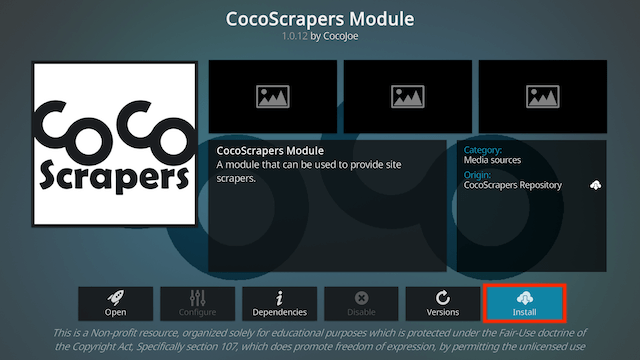
- You may see a notification that this will replace the module in add-on. Select Yes. You may also see a notification saying it can't be removed. Don't worry it will install

- Keep scrolling for details on how to setup Fen to use the CocoScrapers Module
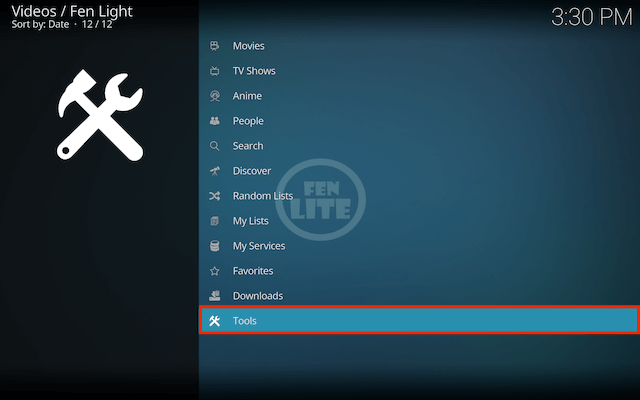
Now to setup Fen so it uses the CocoScrapers Module
- Open Fen
- Select Tools (located at the bottom)
- Select Settings
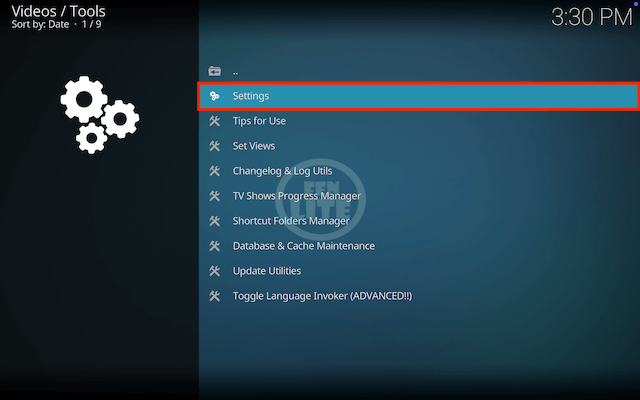
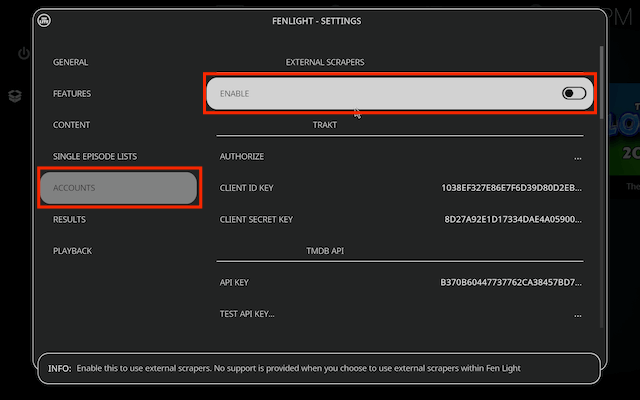
- Select Accounts and select Enable External Scrapers
- Select Choose External Scrapers Module
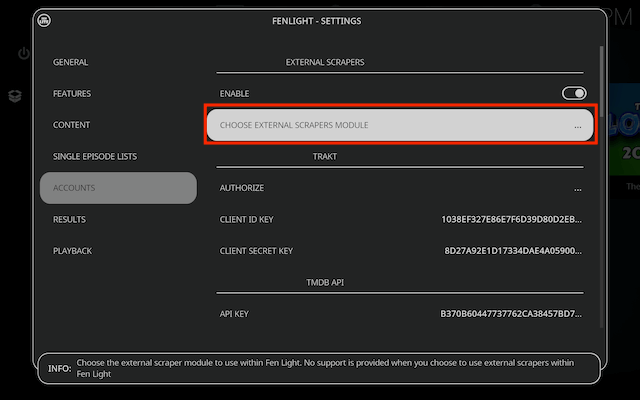
- Select CocoScrapers Module
- Selct OK when you see the success message

- Select OK again (top right)
How to Setup Debrid in Fen:
- If you don't already have a Real Debrid account you can get one from here.
- You need to be logged in to your Real Debrid account on your computer/laptop for this to work
- Open Fen
- Select Tools
- Select Settings
- In the left hand menu select Accounts
- Move to the right and scroll down to the debrid service that is applicable to you and select Authorize
- Now follow the on screen instructions
- Once you have netered the necessary code your Debrid account will be associated to your device and should work as intended
How to Setup Trakt in Fen Kodi:
- Open Fen
- Select Tools
- Select Settings
- In the left hand menu select Accounts and then in the right hand screen you will see Trakt section. Click Authorize
- A popup will now appear with a code. So you will now have to go to the Trakt Activate page
- Enter the code that appeared in the popup in the Placenta add-on and select CONTINUE
- If done correctly it will say that Placenta wants access to your Trakt account. Select YES
- You should now see a Confirmation Message
- Now in Meta Accounts > Trakt you should see your Trakt username to the right of Authorization (you can't see it on mine as I have hidden it). Select OK and Trakt will work in the My TV Shows and My Movies sections
Legal Disclaimer: This tutorial is purely educational. Seo-Michael.co.uk doesn’t own, host, operate, resell, or distribute any streaming apps, addons, websites, IPTV or services. The page contains some unverified services, and we are not certain whether they hold legal licenses to distribute the content. Seo-Michael.co.uk does not verify the legality of each app/service in all regions. Do your due diligence if you use any of the unverified apps/services, and stream only content that is available in the public domain. The end-user shall be solely responsible for the media accessed.
